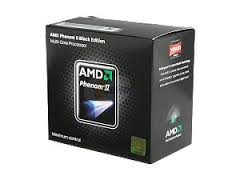
A few years back, I decided to build myself a gaming computer. I had a budget of around $1000 for this build and at the time, the AMD 965 black edition was a great processor for the price. This processor has 4 cores that all run at 3.4 GHz. I really wanted an SSD for this particular build, so buying one of these a few years ago took up a good amount of the budget. I also couldn’t buy a huge one since they were so costly, so I had to add a large SATA drive as well to the build. Nowadays, these are a little bit more reasonable, but still expensive. Even to this day, this gaming rig can still run the latest games. In the past year, I have played Battlefield 3, COD:Black Ops 2, Counter-Strike:GO, Starcraft 2, and a few others.
Recently though, I thought it would be a good time to start to think about overclocking the 965. By overclocking, I could squeeze out a few more frames per second (FPS) or maybe I could even up the graphics levels a bit in the games I play. In this guide, I want to go over a few ways to overclock the AMD 965 Phenom II. Also, before we get into this too much, you should know that overclocking has the potential to damage your CPU. So, you should know this going in and be careful when you are messing with BIOS settings.
Modest Overclocking with AMD OverDrive
If you have any of the AMD Black edition processors, you can really easily achieve a modest overclock by using the AMD OverDrive Software. Like I said above, this will only get you modest overclocking speeds. However, it is pretty safe to use and any extra speed counts!
You can use tools like CPU-Z and CoreTemp to monitor your CPU’s speed and your CPU’s temperature. Heat is one thing that can damage your CPU, so you will want to make sure it is running at reasonable temperatures while under load.
Achieving More Aggressive Overclocking
If you want to achieve more aggressive overclocking speeds, it is still relatively simple with the Black edition processors. For this, you might need to start messing with voltages depending on how aggressive you want to be. So, be careful when doing this.
To achieve a more aggressive overclock, I went into the BIOS by pressing the “DEL” key when the PC was starting up. From here, I clicked over to the “Advanced” tab and then clicked on “JumperFree Configuration”. I have also seen this be under “Intelligent tweaker” for some boards. This may be a bit different depending on your BIOS and motherboard. However, it should be named something pretty similar. In general, you are looking for your CPU options. From here, I had an entry for “Processor Frequency Multiplier”. I went ahead and set mine at “x18.0 3600 MHz”. This is still a reasonable place to start when overclocking. After this, I restarted the computer and then stressed tested it by playing a few games and running Prime95 for multiple hours. For me, this worked without any issues. However, I do have some solid cooling equipment. If this is too aggressive for your particular build, you may need to either up the voltage a bit or lower the overclock.
If I wanted to go higher than the 3.6 GHz, I needed to start messing with voltages. This setting will be under the “CPU Voltage Control” line item in the BIOS. It could also be under the “CPU Over Voltage” for a few motherboards. Be very careful when messing with this. I wouldn’t go any higher than 10% over stock value to start. After you raise the voltage, you can start to mess with the multiplier again to see if you can achieve an overclock over the 3.6 GHz. If this all worked out really well, then you can try to inch up the voltage or multiplier even more. To be safe, I would inch them up, especially the voltage, very slowly. Also, there is nothing wrong with leaving your overclock at a more moderate speed. This will keep the wear and tear at a reasonable level.
As I stated above, make sure you are monitoring your CPU Temps while putting the computer under load to make sure they are staying at ok levels.
Have any more tips? Feel free to leave them in the comments.

